How to Improve WordPress Image Loading Speed
Images make a website attractive, professional, and engaging. Whether you operate a business website, blog, portfolio, or WooCommerce store, images help visitors understand your products and services.
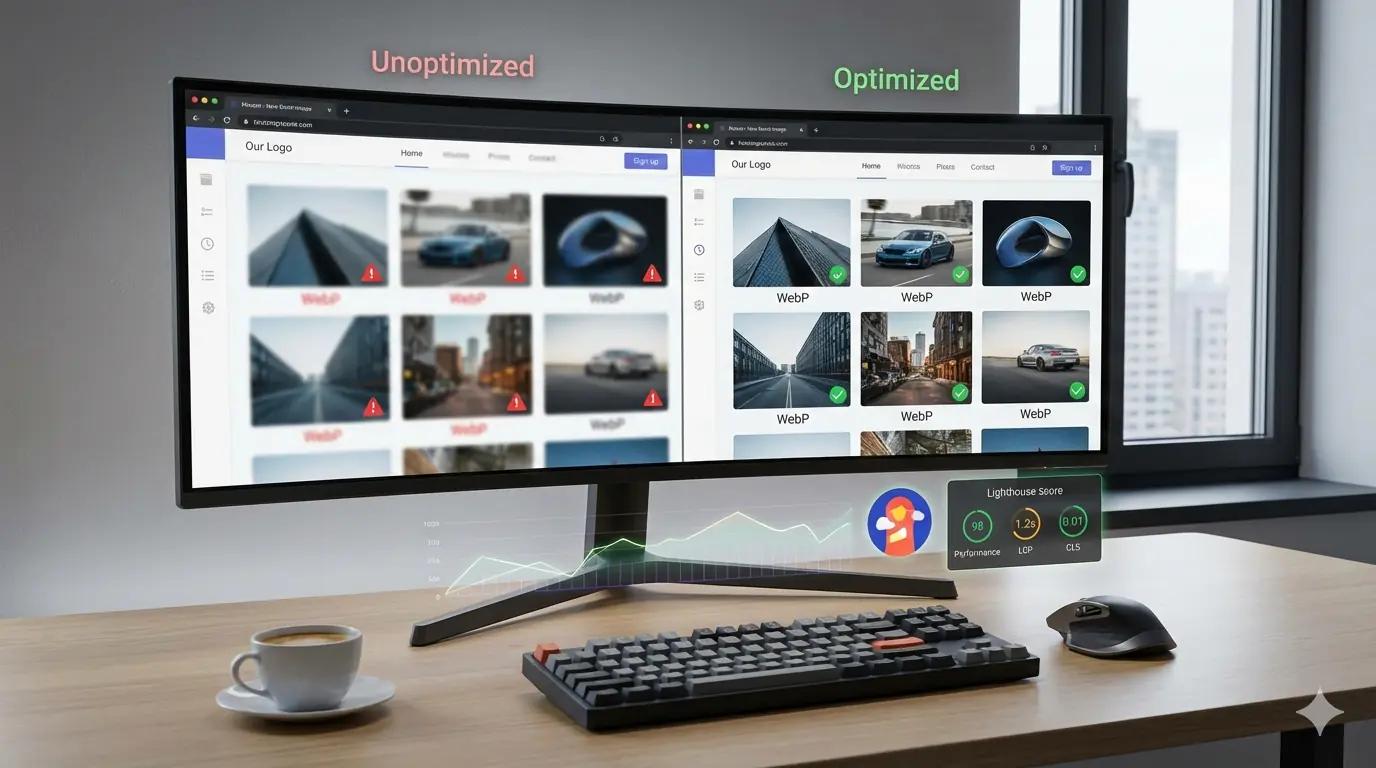
However, large and unoptimized images can make your WordPress website slow. Visitors may have to wait several seconds before images appear, especially when browsing on mobile devices or slower internet connections.
A slow website can negatively affect user experience, increase visitor frustration, and reduce sales opportunities.
The good news is that you don’t need to rebuild your website to solve this problem. By applying the right WordPress image optimization techniques, you can significantly improve loading performance.
In this guide, you’ll learn 10 practical ways to improve WordPress image loading speed without compromising your website design.
1. Compress Images Before Uploading
One of the most common reasons for slow WordPress websites is uploading large image files.
For example, a photograph downloaded directly from a camera might be 5 MB or larger. Uploading several images of this size can increase page weight significantly.
Image compression reduces file size while maintaining acceptable visual quality.
Recommended tools include:
- TinyPNG
- Squoosh
- ShortPixel
- Imagify
- EWWW Image Optimizer
Example:
| Image format | Original size | Optimized size |
|---|---|---|
| JPG | 2.5 MB | 350 KB |
| PNG | 1.8 MB | 450 KB |
| WebP | 350 KB | 120 KB |
These are illustrative examples, not guaranteed compression results.
2. Use WebP or AVIF Image Formats
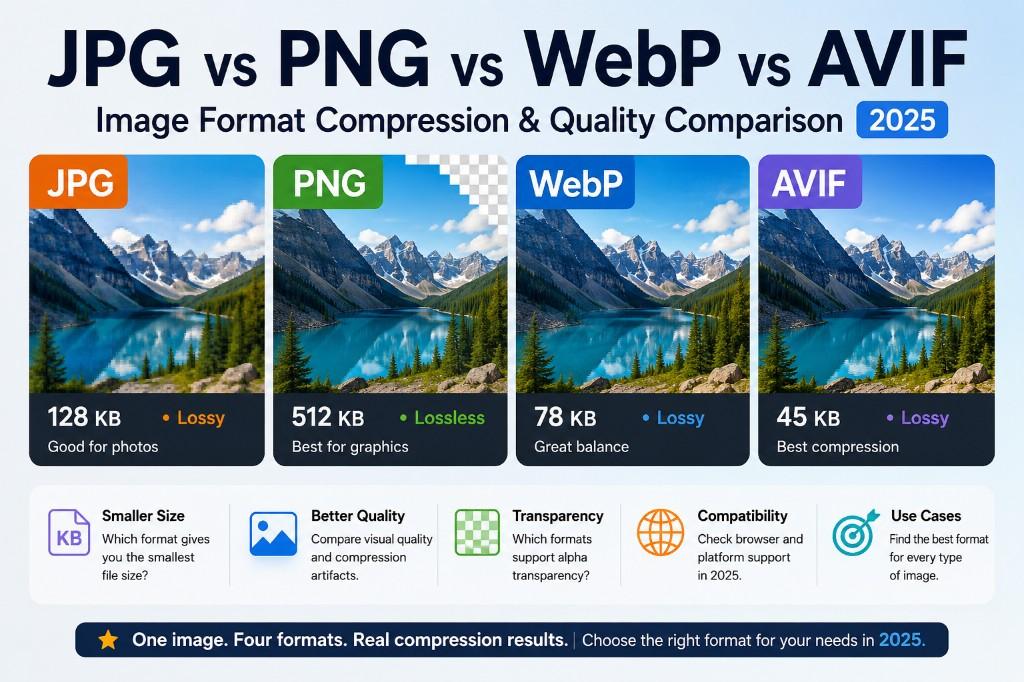
Traditional JPG and PNG formats can contain unnecessary file data.
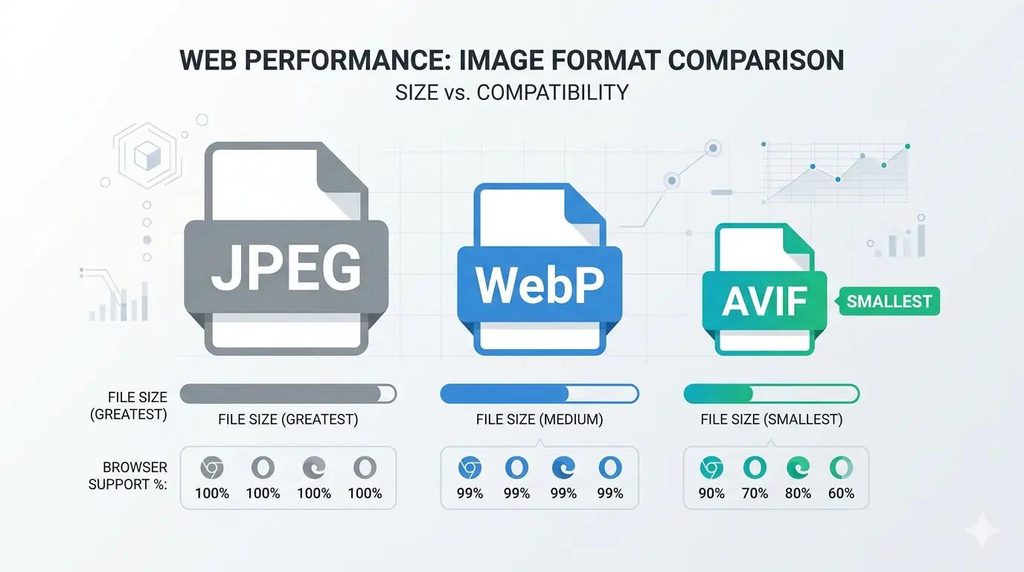
Modern image formats such as WebP and AVIF can deliver smaller images at comparable visual quality.
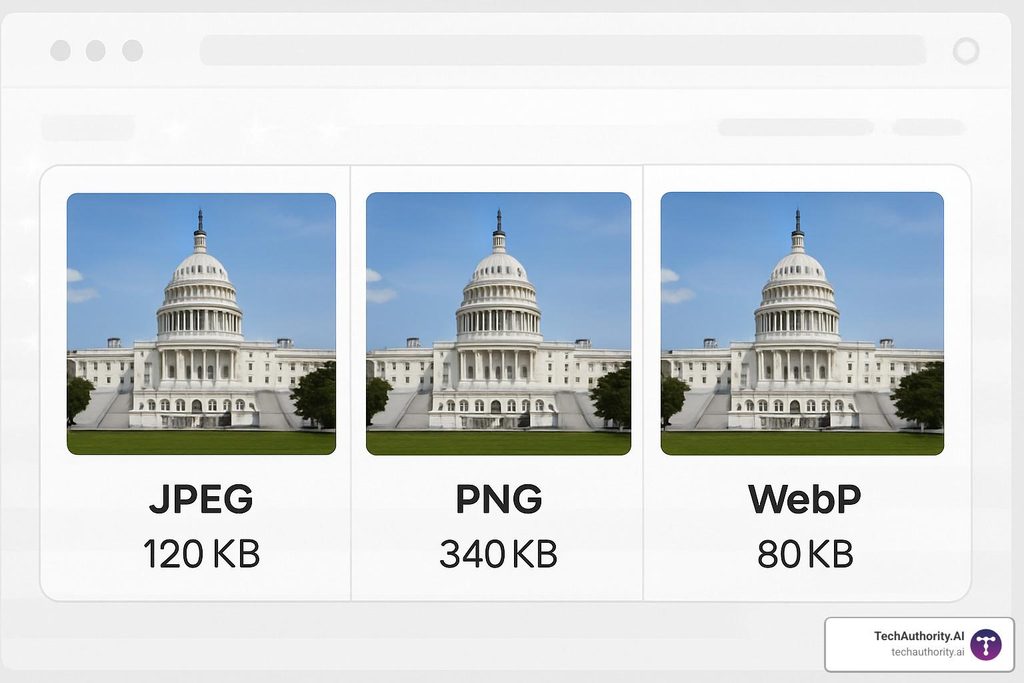
8
Why use WebP or AVIF?
- Smaller image file sizes.
- Faster image downloads.
- Reduced bandwidth consumption.
- Better performance on mobile devices.
For WordPress websites, you can use image optimization plugins to generate modern formats automatically.
Before implementing AVIF or WebP, check that your theme, CDN, and image delivery setup serve the correct format to supported browsers.
3. Resize Images to the Correct Dimensions
Uploading a 3000-pixel-wide image into a 400-pixel content area wastes bandwidth.
Always resize images according to their actual display dimensions.
For example:
| Image location | Suggested dimensions |
|---|---|
| Blog featured image | 1200 × 675 px |
| Blog thumbnail | 600 × 400 px |
| Product image | 800 × 800 px |
| Website logo | 300 × 100 px |
| Hero banner | 1920 × 700 px |
These are starting points. Your theme’s actual image dimensions and responsive layouts should determine the final sizes.
Use WordPress responsive image features (srcset and sizes) to let browsers select an appropriately sized image for different screens.
4. Enable Lazy Loading
Lazy loading is one of the easiest ways to improve image loading speed.
Normally, a browser may request many images when a visitor opens a page. Lazy loading allows images outside the visible screen to load when visitors scroll closer to them.
For example, a blog containing 15 images doesn’t necessarily need to download all 15 immediately.
WordPress supports native lazy loading for images.
Example HTML:
<img
  src="blog-image.webp"
  alt="WordPress image optimization"
  loading="lazy"
  width="800"
  height="450"
>
Important: Do not lazy-load your main above-the-fold hero image or likely Largest Contentful Paint (LCP) image. Load that image eagerly and consider using fetchpriority="high" where appropriate.
5. Use a Content Delivery Network (CDN)
A Content Delivery Network stores and delivers website assets through servers distributed across different locations.
When someone visits your website, a CDN can deliver images from a server closer to that visitor.
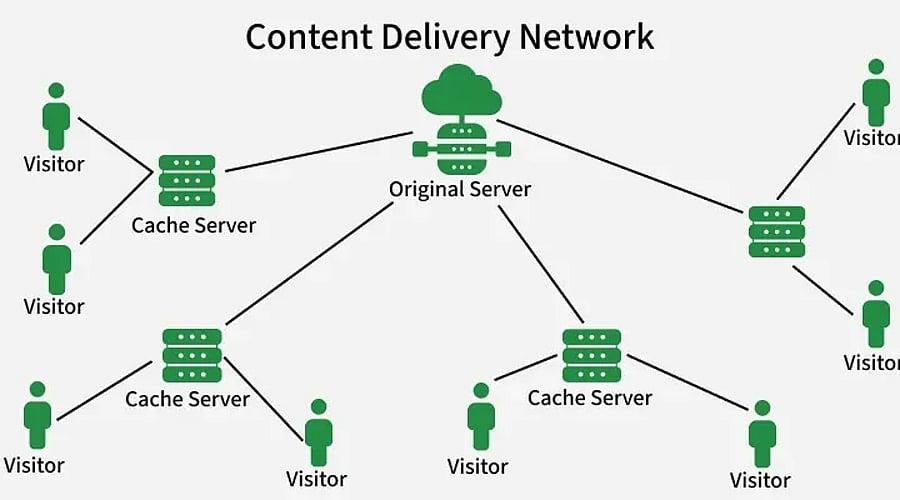
Popular CDN services include:
- Cloudflare
- Bunny CDN
- QUIC.cloud
- Amazon CloudFront
A CDN can reduce image delivery latency, improve caching, and reduce the workload on your hosting server.
For WordPress websites using LiteSpeed Cache, QUIC.cloud is also worth considering.
6. Choose the Right Image Optimization Plugin
You don’t need to manually optimize every image. WordPress plugins can automate many optimization tasks.
| Plugin | Main functionality |
|---|---|
| ShortPixel | Image compression and WebP |
| Imagify | Automatic image optimization |
| EWWW Image Optimizer | Image compression and format conversion |
| Smush | Image optimization and lazy loading |
| LiteSpeed Cache | Image optimization and caching |
Choose one primary image optimization solution to avoid duplicate processing and conflicting settings.
7. Set Image Dimensions to Prevent Layout Shifts
Have you ever opened a website where the text suddenly moves down while images load?
This is called Cumulative Layout Shift (CLS).
It happens when the browser doesn’t know how much space an image needs before the image finishes loading.
You can reduce this problem by defining image dimensions.
<img
  src="wordpress-speed.webp"
  alt="WordPress speed optimization"
  width="800"
  height="450"
  loading="lazy"
>
Correct image dimensions help browsers reserve space before the image appears.
This improves visual stability and user experience.
8. Optimize WooCommerce Product Images
If you run a WooCommerce store, product images are especially important.
Large product galleries, thumbnails, and additional product photographs can increase page loading time.
Follow these recommendations:
- Compress product images before uploading.
- Use WebP or AVIF formats.
- Generate appropriately sized thumbnails.
- Avoid uploading unnecessary duplicate images.
- Enable browser caching.
- Use a CDN for product images.
A faster product page can help customers browse products more smoothly.
9. Enable Browser Caching for Images
Browser caching allows returning visitors to reuse previously downloaded images instead of requesting them again.
For example, if a customer visits your website today and returns tomorrow, cached images may load directly from their browser.
You can configure image caching through your CDN, hosting server, or caching plugin.
For Apache servers, an example configuration is:
<IfModule mod_expires.c>
  ExpiresActive On

  ExpiresByType image/jpeg "access plus 1 year"
  ExpiresByType image/png "access plus 1 year"
  ExpiresByType image/webp "access plus 1 year"
  ExpiresByType image/avif "access plus 1 year"
  ExpiresByType image/svg+xml "access plus 1 year"
</IfModule>
Only use long expiration periods for images with versioned filenames or URLs. If an image changes without its URL changing, browsers may continue displaying the old cached version.
10. Test Your WordPress Image Loading Performance
After optimizing images, test your website to understand whether the changes actually improved performance.
Useful testing tools include:
- Google PageSpeed Insights
- GTmetrix
- WebPageTest
- Chrome Lighthouse
Pay attention to these Core Web Vitals:
| Metric | Good target |
|---|---|
| LCP | 2.5 seconds or less |
| INP | 200 ms or less |
| CLS | 0.1 or less |
These are Google’s recommended thresholds at the 75th percentile of real-user visits.
11. Animated Image Optimization Performance Chart
A visual chart helps website owners understand how image optimization can reduce image file sizes.
The following animated chart uses HTML and CSS. You can add it directly to a WordPress Gutenberg Custom HTML block.
Example: Image size reduction after optimization
WordPress Image Optimization
Example of potential image file size reduction.
12. WordPress Image Optimization Checklist
Before publishing your next WordPress article or product page, check these important points:
- Compress images before uploading.
- Convert supported images to WebP or AVIF.
- Resize images according to their display dimensions.
- Enable lazy loading for below-the-fold images.
- Exclude the main hero image from lazy loading.
- Configure CDN image delivery.
- Enable browser caching.
- Add image width and height attributes.
- Optimize WooCommerce product galleries.
- Test your website using Google PageSpeed Insights.
Improving WordPress image loading speed is an important part of website performance optimization.
Large images, incorrect dimensions, missing caching, and inefficient image delivery can make websites slower than necessary.
By compressing images, using WebP or AVIF, implementing lazy loading, configuring a CDN, and testing performance, you can create a faster and smoother browsing experience.
Remember that image optimization is not a one-time task. Whenever you upload new blog images, banners, or WooCommerce product photographs, follow the same optimization process.
A faster website improves user experience and gives visitors a better reason to explore your services and products.
Need help optimizing your WordPress website? Professional WordPress speed optimization can help identify image-loading problems, improve Core Web Vitals, and create a better experience for your visitors.